

Many organizations have security policies in place that dictate how to store sensitive information. When you're developing applications for the cloud, you're probably expected to follow those policies, and to do that you often have to externalize your data storage. Kubernetes has a built-in system to access external secrets, and learning to use that is key to a safe cloud-native app.
In this article, I'm going to demonstrate how to build a Quarkus reactive application with externalized sensitive information—for instance, a password or token—using Kubernetes Secrets. A secret is a good example of how cloud platforms can secure applications by removing sensitive data from your static code. Note that you can find a solution to this tutorial in this GitHub repository.
[ Read next: How to explain Kubernetes Secrets ]
1. Scaffold a new reactive Quarkus project
Use the Quarkus command-line interface (CLI) to scaffold a new project. If you haven't already installed the Quarkus CLI, follow these instructions according to your operating system.
Run the following Quarkus CLI in your project directory to add kubernetes-config, resteasy-reactive, and openshift extensions:
$ quarkus create app quarkus-secret-example \
-x resteasy-reactive,kubernetes-config,openshift
The output should look like this:
Looking for the newly published extensions in registry.quarkus.io
selected extensions:
- io.quarkus:quarkus-kubernetes-config
- io.quarkus:quarkus-resteasy-reactive
- io.quarkus:quarkus-openshift


applying codestarts...
📚  java
🔨  maven
📦  quarkus
📝  config-properties
🔧  dockerfiles
🔧  maven-wrapper
🚀  resteasy-reactive-codestart

-----------

[SUCCESS] ✅  quarkus project has been successfully generated in:
--> /tmp/quarkus-secret-example
-----------
Navigate into this directory and get started: quarkus dev
2. Create a Secret in Kubernetes
To manage the Kubernetes Secrets, you have three options:
- Using kubectl
- Using Configuration File
- Node Kustomize
Use the kubectl command to create a new database credential (a username and password). Run the following command:
$ kubectl create secret generic db-credentials \
 --from-literal=username=admin \
 --from-literal=password=secret
If you haven't already installed a Kubernetes cluster locally, or you have no remote cluster, you can sign in to the developer sandbox, a no-cost sandbox environment for Red Hat OpenShift and CodeReady Workspaces.
You can confirm that the Secret is created properly by using the following command:
$ kubectl get secret/db-credentials -o yamlThe output should look like this:
apiVersion: v1
data:
  password: c2VjcmV0
  username: YWRtaW4=
kind: Secret
metadata:
  creationTimestamp: "2022-05-02T13:46:18Z"
  name: db-credentials
  namespace: doh-dev
  resourceVersion: "1190920736"
  uid: 936abd44-1097-4c1f-a9d8-8008a01c0add
type: Opaque
The username and password are encoded by default.
3. Create a new RESTful API to access the Secret
Now you can add a new RESTful (for Representational State Transfer) API to print out the username and password stored in the Kubernetes Secret. Quarkus enables developers to refer to the secret as a normal configuration using a @ConfigureProperty annotation.
Open a GreetingResource.java file in src/main/java/org/acme. Then, add the following method and configurations:
@ConfigProperty(name = "username")
    String username;

    @ConfigProperty(name = "password")
    String password;

    @GET
    @Produces(MediaType.TEXT_PLAIN)
    @Path("/securty")
    public Map securty() {
        HashMap<String, String> map = new HashMap<>();
        map.put("db.username", username);
        map.put("db.password", password);
        return map;
    }
Save the file.
4. Set the configurations for Kubernetes deployment
Open the application.properties file in the src/main/resources directory. Add the following configuration for the Kubernetes deployment. In the tutorial, I'll demonstrate using the developer sandbox, so the configurations tie to the OpenShift cluster.
If you want to deploy it to the Kubernetes cluster, you can package the application via Docker container directly. Then, you need to push the container image to an external container registry (for example, Docker Hub, quay.io, or Google container registry).
# Kubernetes Deployment
quarkus.kubernetes.deploy=true
quarkus.kubernetes.deployment-target=openshift
openshift.expose=true
quarkus.openshift.build-strategy=docker
quarkus.kubernetes-client.trust-certs=true

# Kubernetes Secret
quarkus.kubernetes-config.secrets.enabled=true
quarkus.kubernetes-config.secrets=db-credentials
Save the file.
5. Build and deploy the application to Kubernetes
To build and deploy the reactive application, you can also use the following Quarkus CLI:
$ quarkus buildThis command triggers the application build to generate a fast-jar file. Then the application Jar file is containerized using a Dockerfile, which was already generated in the src/main/docker directory when you created the project. Finally, the application image is pushed into the integrated container registry inside the OpenShift cluster.
The output should end with a BUILD SUCCESS message.
When you deploy the application to the developer sandbox or normal OpenShift cluster, you can find the application in the Topology view in the Developer perspective, as shown in the figure below.
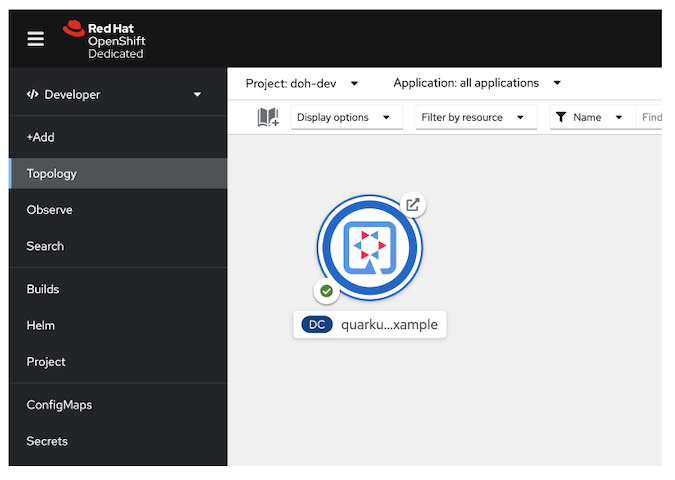
(Daniel Oh, CC BY-SA 4.0)
6. Verify the sensitive information
To verify that your Quarkus application can refer to the sensitive information from the Kubernetes Secret, get the route URL using the following kubectl command:
$ kubectl get routeThe output is similar to this:
NAME                     HOST/PORT                                                               PATH   SERVICES                 PORT   TERMINATION   WILDCARD
quarkus-secret-example   quarkus-secret-example-doh-dev.apps.sandbox.x8i5.p1.openshiftapps.com          quarkus-secret-example   8080                 None
Use the curl command to access the RESTful API:
$ curl https://YOUR_ROUTE_URL/hello/securityThe output:
{db.password=secret, db.username=admin}Awesome! The above username and password are the same as those you stored in the db-credentials secret.
Where to learn more
This guide has shown how Quarkus enables developers to externalize sensitive information using Kubernetes Secrets. Find additional resources to develop cloud-native microservices using Quarkus on Kubernetes here:
- 7 guides for developing applications on the cloud with Quarkus
- Extend Kubernetes service discovery with Stork and Quarkus
- Deploy Quarkus applications to Kubernetes using a Helm chart
You can also watch this step-by-step tutorial video on how to manage Kubernetes Secrets with Quarkus.


Comments are closed.