

Who wants to create their first UI app? I do, and if you're reading this article, I assume you do, too. In today's example, I'll use some JavaScript and the API with Express I demonstrated in my previous article. First, let me explain some of the tech you're about to use.
What is React?
React is a JavaScript library for building a user interface (UI). However, you need more than just the UI library for a functional UI. Here are the important components of the JavaScript web app you're about to create:
- npx: This package is for executing npm packages.
- axios: A promise-based HTTP client for the browser and node.js. A promise is a value that an API endpoint will provide.
- http-proxy-middleware: Configures proxy middleware with ease. A proxy is middleware that helps deal with messaging back and forth from the application endpoint to the requester.
Preconfiguration
If you haven't already, look at my previous article. You'll use that code as part of this React app. In this case, you'll add a service to use as part of the app. As part of this application, you have to use the npx package to create the new folder structure and application:
$ npx create-react-app count-ui
npx: installed 67 in 7.295s

Creating a new React app in /Users/cherrybomb/count-ui.

Installing packages. This might take a couple of minutes.
Installing react, react-dom, and react-scripts with cra-template...
[...]
Installing template dependencies using npm...
+ @testing-library/jest-dom@5.16.4
+ @testing-library/user-event@13.5.0
+ web-vitals@2.1.4
+ @testing-library/react@13.3.0
added 52 packages from 109 contributors in 9.858s
[...]
Success! Created count-ui at /Users/cherrybomb/count-ui
[...]
We suggest that you begin by typing:

  cd count-ui
  npm start
As you can see, the npx command has created a new template with a folder structure, an awesome README file, and a Git repository. Here's the structure:
$ cd count-ui/
/Users/cherrybomb/count-ui

$ ls -A -1
.git
.gitignore
README.md
node_modules
package-lock.json
package.json
public
src
This process also initialized the Git repo and set the branch to master, which is a pretty cool trick. Next, install the npm packages:
$ npm install axios http-proxy-middleware
[...]
npm WARN @apideck/better-ajv-errors@0.3.4 requires a peer of ajv@>=8 but none is installed. You must install peer dependencies yourself.
+ http-proxy-middleware@2.0.6
+ axios@0.27.2
added 2 packages from 2 contributors, updated 1 package and audited 1449 packages in 5.886s
Now that those are set up, add your services, and main.js file:
$ mkdir src/services
src/services

$ touch src/services/main.js
Preconfiguration is now complete, so you can now work on coding.
Code a UI from start to finish
Now that you have everything preconfigured, you can put together the service for your application. Add the following code to the main.js file:
import axios from 'axios';
const baseURL = 'https://localhost:5001/api';
export const get = async () => await axios.get(`${baseURL}/`);
export const increment = async () => await axios.post(`${baseURL}/`);
export default {
    get,
    increment
}
This process creates a JavaScript file that interacts with the API you created in my previous article.
Set up the proxy
Next, you must set up a proxy middleware by creating a new file in the src directory.
$ touch src/setupProxy.jsConfigure the proxy with this code in setupProxy.js:
const { createProxyMiddleware } = require('http-proxy-middleware');
module.exports = function(app) {
  app.use(
    '/api',
    createProxyMiddleware({
      target: 'https://localhost:5000',
      changeOrigin: true,
    })
  );
};
In this code, the app.use function specifies the service to use as /api when connecting to the existing API project. However, nothing defines api in the code. This is where a proxy comes in. With a proxy, you can define the api function on the proxy level to interact with your Express API. This middleware registers requests between both applications because the UI and API use the same host with different ports. They require a proxy to transfer internal traffic.
JavaScript imports
In your base src directory, you see that the original template created an App.js, and you must add main.js (in the services directory) to your imports in the App.js file. You also need to import React on the very first line, as it is external to the project:
import React from 'react'
import main from './services/main';
Add the rendering function
Now that you have your imports, you must add a render function. In the App() function of App.js, add the first section of definitions for react and count before the return section. This section gets the count from the API and puts it on the screen. In the return function, a button provides the ability to increment the count.
function App() {
const [count, setCount] = React.useState(0);
React.useEffect(()=>{
  async function fetchCount(){
    const newCount = (await main.get()).data.count;
    setCount(newCount);
  }
  fetchCount();
}, [setCount]);
return (
    <div className="App">
      <header className="App-header">
        <h4>
          {count}
        </h4>
        <button onClick={async ()=>{
          setCount((await main.increment()).data.count);
        }}>
          Increment
        </button>
      </header>
    </div>
  );
}
To start and test the app, run npm run start. You should see the output below. Before running the application, confirm your API is running from the Express app by running node ./src/index.js.
$ npm run start
> count-ui@0.1.0 start /Users/cherrybomb/count-ui
> react-scripts start

[HPM] Proxy created: /  -> https://localhost:5000
(node:71729) [DEP_WEBPACK_DEV_SERVER_ON_AFTER_SETUP_MIDDLEWARE] DeprecationWarning: 'onAfterSetupMiddleware' option is deprecated. Please use the 'setupMiddlewares' option.
(Use `node --trace-deprecation ...` to show where the warning was created)
(node:71729) [DEP_WEBPACK_DEV_SERVER_ON_BEFORE_SETUP_MIDDLEWARE] DeprecationWarning: 'onBeforeSetupMiddleware' option is deprecated. Please use the 'setupMiddlewares' option.
Starting the development server...
Once everything is running, open your browser to localhost:5000 to see the front end has a nice, admittedly minimal, page with a button:

(Jessica Cherry, CC BY-SA 4.0)
What happens when you press the button? (Or, in my case, press the button several times.)
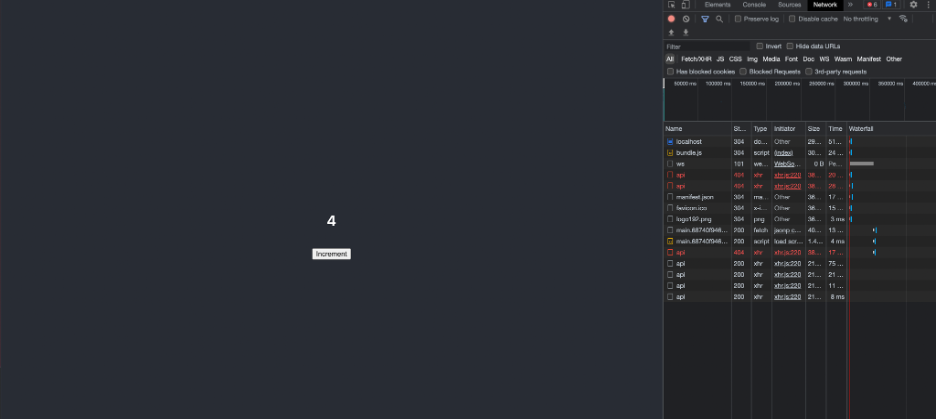
(Jessica Cherry, CC BY-SA 4.0)
The counter goes up!
Congratulations, you now have a React app that uses your new API.
Web apps and APIs
This exercise is a great way to learn how to make a back end and a front end work together. It's noteworthy to say that if you're using two hosts, you don't need the proxy section of this article. Either way, JavaScript and React are a quick, templated way to get a front end up and running with minimal steps. Hopefully, you enjoyed this walk-through. Tell us your thoughts on learning how to code in JavaScript.


1 Comment