

I suppose I'm lucky in that for more than 10 years my primary work environment has been Linux-based, yet all too often I've been forced to dig out a DOS or Windows image because I need to patch some BIOS device firmware. These days I don't own anything that has a valid Windows license, and even my 2008 white MacBook has spent most of its life running either Ubuntu or Fedora. Luckily most hardware manufacturers have started to provide bootable images for patching system firmware, and for enterprise-grade hardware they even provide Linux-ready tools. In this article, I'll walk through my recent firmware update on Linux, and I'll share a few recommendations based on that experience.
In the consumer/prosumer landscape there has been a shift toward UEFI-based systems for desktops and laptops, and along the way many manufacturers appear to have removed the option for the BIOS to update from a USB Stick. Historically we'd only see firmware updates for enterprise-class spinning rust (hard drives), but many SSD manufacturers are also providing regular firmware updates for consumer-class devices. Whilst we often should stand by the old adage "If it ain't broke, don't fix it," I'm a strong believer when standing up a new environment to make sure all my firmware is current. So begins my journey...
My update adventure
For many years I've been involved with the MythTV project (open source DVR), including at one point producing consumer-ready systems in New Zealand (myPVR). Recently I was after an Intel-based compact PC that could operate as a MythTV front-end, was capable of running Kodi (open source theater system), and could also be occasionally re-purposed as a hypervisor for my home lab.
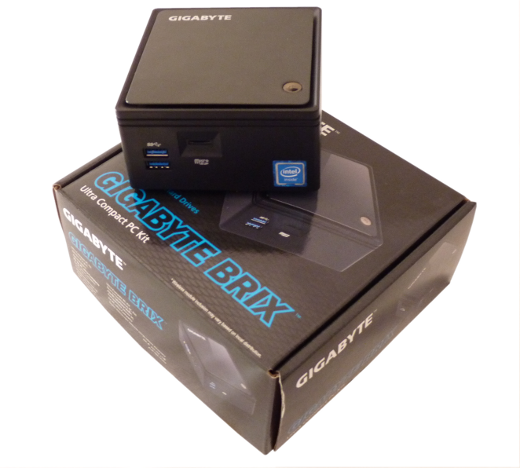
I picked up a GIGABYTE BRIX based on a quad-core N3150 processor, and re-purposed spare RAM and hard drives, for a simple and effective solution. The integrated Intel HD Graphics are capable of H265/HEVC at 24 frames/second, plus the CPU has VT for hardware accelerated virtualization (sadly only upgradable to 8GB RAM, but enough for a simple testbed).
With any new equipment, my first step is to try a live USB image to test the hardware. I have a number of bootable images on hand, including Fedora, Ubuntu, and Red Hat Enterprise Linux, and these days I tend toward a 64-bit image for testing as ultimately I'll be running a 64-bit operating system. I also confirmed that the system was set up with VT enabled for hardware accelerated virtualization as a surprising number of systems still ship with this setting disabled in BIOS or UEFI.

Great tools at this point within a live image are dmidecode and lspci to pull firmware and hardware information:
$ sudo dmidecode
System Information
        Manufacturer: GIGABYTE
        Product Name: GB-BACE-3150
        Version: 1.x
        Serial Number: To be filled by O.E.M.
        UUID: 0XXXXXXX-0XXX-XXXX-XXXX-XXXXXXXXXXXX
        Wake-up Type: Power Switch
        SKU Number: To be filled by O.E.M.
        Family: To be filled by O.E.M.

Handle 0x0000, DMI type 0, 24 bytes
BIOS Information
        Vendor: American Megatrends Inc.
        Version: F2
        Release Date: 06/29/2015


$ sudo lspci
00:00.0 Host bridge: Intel Corporation Device 2280 (rev 21)
00:02.0 VGA compatible controller: Intel Corporation Device 22b1 (rev 21)
00:10.0 SD Host controller: Intel Corporation Device 2294 (rev 21)
00:13.0 SATA controller: Intel Corporation Device 22a3 (rev 21)
00:14.0 USB controller: Intel Corporation Device 22b5 (rev 21)
00:1a.0 Encryption controller: Intel Corporation Device 2298 (rev 21)
00:1b.0 Audio device: Intel Corporation Device 2284 (rev 21)
00:1c.0 PCI bridge: Intel Corporation Device 22c8 (rev 21)
00:1c.1 PCI bridge: Intel Corporation Device 22ca (rev 21)
00:1c.3 PCI bridge: Intel Corporation Device 22ce (rev 21)
00:1f.0 ISA bridge: Intel Corporation Device 229c (rev 21)
00:1f.3 SMBus: Intel Corporation Device 2292 (rev 21)
01:00.0 Unassigned class [ff00]: Realtek Semiconductor Co., Ltd. Device 522a (rev 01)
02:00.0 Network controller: Intel Corporation Wireless 3160 (rev 83)
03:00.0 Ethernet controller: Realtek Semiconductor Co., Ltd. RTL8111/8168/8411 PCI Express Gigabit Ethernet Controller (rev 15)
The only device I'm expecting to have potential issues with is the Realtek 522a-based MicroSD card reader. All other devices are well supported by modern Linux distributions.
Looking at GIGABYTE's site confirmed a new firmware update for the UEFI-based BIOS, which resolves some issues with USB devices and selected monitors. Given one of my primary use cases is as an HTPC, good monitor support is critical, so it was time to update.
A quick check of the supplied brix_bios_gb-bace-3150_f3.zip update confirmed the lack of Linux tools, and I've never tried a firmware update from the UEFI firmware directly from the UEFI shell. The BIOS-style front end also has no options for updating the firmware.

Searching online for AMI UEFI patching pulled up an old Phoronix article for MSI hardware (MSI: Update your BIOS from the Linux desktop) indicating that a tool called afulnx_64 might be an option. Being somewhat wary of patching my system using random tools from file-hosting sites, I discovered that GIGABYTE ship a version of the tool for their rack-mount enterprise focused systems.
Let's try out the afulnx_64 executable from the tools folder in the ZIP file provided by GIGABYTE:
./afulnx_64
Error: Cannot locate kernel source.
e - Error: Kernel source files cannot be found.
The tool needs to build a kernel module in order to patch my BIOS. From a security perspective, this is a little worrying, but looks like a better approach than some of the UEFI tools Matthew Garret has spoken about in recent years.
In addition there have been a number of recent security vulnerabilities, including one labled ThinkPwn, in the UEFI for a number of key Intel chipsets that has affected producs from Lenovo, Gigabyte, HP and many others. Keeping an eye on new UEFI releases for your hardware might be considerably more critical than the old days of BIOS updates, especially given the power of the UEFI subsystem on modern hardware.
- Lenovo: System Management Mode (SMM) BIOS Vulnerability
- HPSBBHF3549 ThinkPwn UEFI BIOS SmmRuntime Escalation of Privilege
- The Register: Gigabyte BIOS blight fright
At this point I tried looking at truly open alternatives, such as flashrom:
$ sudo flashrom --programmer internal -V
flashrom v0.9.9-rc1-r1942 on Linux 4.4.0-28-generic (x86_64)
flashrom is free software, get the source code at https://flashrom.org
flashrom was built with libpci 3.3.1, GCC 5.3.1 20160225, little endian
Found Macronix flash chip "MX25U6435E/F" (8192 kB, SPI).
This chip may contain one-time programmable memory. flashrom cannot read and may never be able to write it, hence it may not be able to completely clone the contents of this chip (see man page for details). No operations were specified.
Restoring MMIO space at 0x7fc38d7470fc
Not looking good so back to the afulnx_64 tool . Luckily, most live USB images will let you install additional packages, so I pulled in the kernel headers and tried afulnx_64 again. I couldn't get this to work with Ubuntu 14.04 or 16.04, but it did work with RHEL 7.2 Being paranoid about my new hardware I first checked the current bios install to confirm that the tool "appears to work":
$ sudo ./afulnx_64 /S
+--------------------------------------------------------+
           AMI Firmware Update Utility  v3.05.02
Copyright (C)2013 American Megatrends Inc. All Rights Reserved.
+--------------------------------------------------------+
 Reading flash ............... done
 - System ROM ID = 000
 - System ROM GUID = 206a14ad-fcd9-4e0c-91fbd419d9e41972
 - System ROM Secure Flash = Disable.
Then perform a back up of the existing ROM as a further test of the tool:
$ sudo ./afulnx_64  ./F2.ROM /O
+--------------------------------------------------------+
           AMI Firmware Update Utility  v3.05.02
Copyright (C)2013 American Megatrends Inc. All Rights Reserved.
+--------------------------------------------------------+
 Saving current BIOS into file: ./F2.ROM
 Reading flash ............... done
Verify that the tool understands the supplied new ROM for this motherboard:
$ sudo ./afulnx_64 ../image.bin /D
+--------------------------------------------------------+
           AMI Firmware Update Utility  v3.05.02
Copyright (C)2013 American Megatrends Inc. All Rights Reserved.
+--------------------------------------------------------+
 Reading flash ............... done
 - ME Data Size checking . ok
 - FFS checksums ......... ok
 - ROM File Capsule Header checking.. fail
 - ROM File Size checking ........... ok
 - ROM ID checking .................. ok
 - ROM File verification status ..... ok
Fingers and toes crossed time as we did get one error above:
$ sudo ./afulnx_64 ../image.bin
+--------------------------------------------------------+
           AMI Firmware Update Utility  v3.05.02
Copyright (C)2013 American Megatrends Inc. All Rights Reserved.
+--------------------------------------------------------+
 Reading flash ............... done
 - ME Data Size checking . ok
 - FFS checksums ......... ok
 Erasing Main Block .......... done
 Updating Main Block ......... done
 Verifying Main Block ........ done
Confirm the BIOS update via dmidecode:
Handle 0x0000, DMI type 0, 24 bytes
BIOS Information
        Vendor: American Megatrends Inc.
        Version: F3
        Release Date: 03/23/2016
Well that was about two months ago, and the hardware has been performing perfectly since.
Recommendations
- More vendors should allow UEFI BIOS updates directly from the BIOS-style interface. UEFI shell command-line isn't for the casual user.
- If your vendor supplies a bootable image, try to use that first.
- Investigate what supported tools are available, but consider using a live image for patching. I'm somewhat wary of tools that build and install their own kernel modules.
- Assist projects—like flashrom—to avoid these issues in the future.
In my next article, I'll share the fun of patching SSD firmware.


7 Comments