On Linux, you may be familiar with the standard Unix archive command: tar. There's a version of tar on FreeDOS too (and a bunch of other popular archive programs), but the de facto standard archiver on DOS is Zip and Unzip. Both Zip and Unzip are installed in FreeDOS 1.3 RC4 by default.
The Zip file format was originally conceived in 1989 by Phil Katz of PKWARE, for the PKZIP and PKUNZIP pair of DOS archive utilities. Katz released the specification for Zip files as an open standard, so anyone could create Zip archives. As a result of the open specification, Zip became a standard archive on DOS. The Info-ZIP project implements an open source set of ZIP and UNZIP programs.
Zipping files and directories
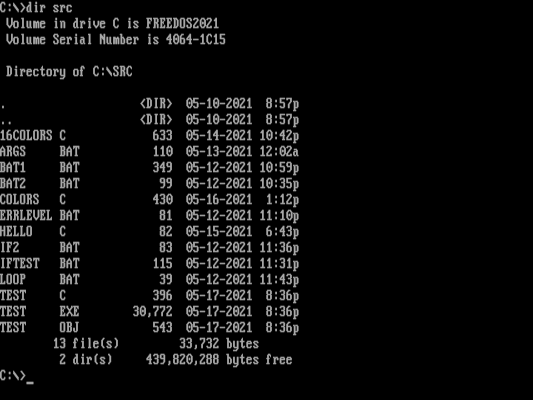
You can use ZIP at the DOS command line to create archives of files and directories. This is a handy way to make a backup copy of your work or to release a "package" to use in a future FreeDOS distribution. For example, let's say I wanted to make a backup of my project source code, which contains these source files:
ZIP sports a ton of command-line options to do different things, but the command line options I use most are -r to process directories and subdirectories recursively, and -9 to provide the maximum compression possible. ZIP and UNZIP use a Unix-like command line, so you can combine options behind the dash: -9r will give maximum compression and include subdirectories in the Zip file.
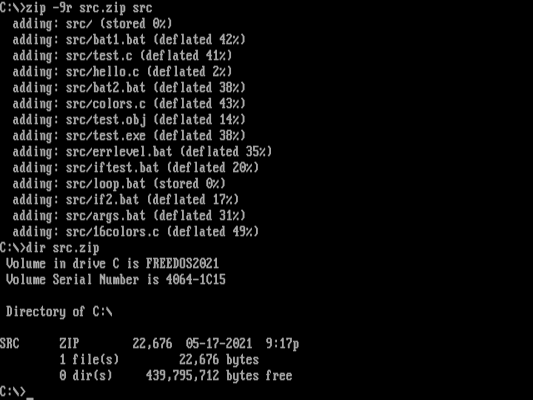
In my example, ZIP was able to compress my source files from about 33 kilobytes down to about 22 kilobytes, saving me 11 kilobytes of valuable disk space. You might get different compression ratios depending on what options you give to ZIP or what files (and how many) you are trying to store in a Zip file. Generally, very long text files (such as source code) yield good compression—very small text files (like DOS "batch" files of only a few lines) are usually too short to compress well.
Unzipping files and directories
Saving files into a Zip file is great, but you'll eventually need to extract those files somewhere. Let's start by examining what's inside the Zip file we just created. For this, use the UNZIP command. You can use a bunch of different options with UNZIP, but I find I use just a few common options.
To list the contents of a Zip file, use the -l ("list") option:
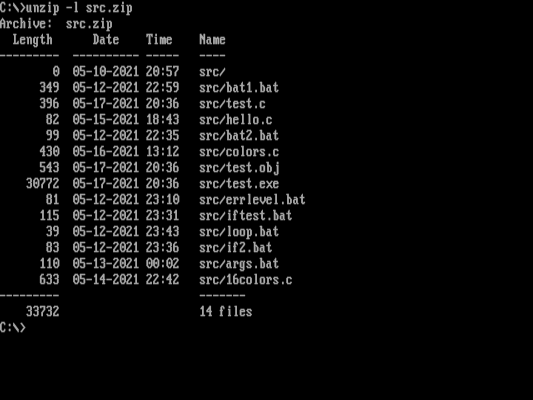
The output allows me to see the 14 entries in the Zip file: 13 files plus the SRC directory entry.
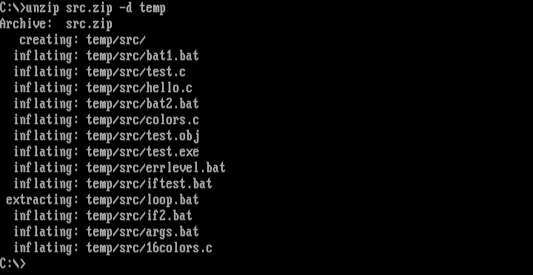
If I want to extract the entire Zip file, I could just use the UNZIP command and provide the Zip file as a command-line option. That extracts the Zip file starting at my current working directory. Unless I'm restoring a previous version of something, I usually don't want to overwrite my current files. In that case, I will want to extract the Zip file to a new directory. You can specify the destination path with the -d ("destination") command-line option:
Sometimes I want to extract a single file from a Zip file. In this example, let's say I wanted to extract TEST.EXE, a DOS executable program. To extract a single file, you specify the full path from the Zip file that you want to extract. By default, UNZIP will extract this file using the path provided in the Zip file. To omit the path information, you can add the -j ("junk the path") option.
You can also combine options. Let's extract the SRC\TEST.EXE program from the Zip file, but omit the full path and save it in the TEMP directory:

Because Zip files are an open standard, we continue to see Zip files today. Every Linux distribution supports Zip files using the Info-ZIP programs. Your Linux file manager may also have Zip file support—on the GNOME file manager, you should be able to right-click on a folder and select "Compress" from the drop-down menu. You'll have the option to create a new archive file, including a Zip file.
Creating and managing Zip files is a key skill for any DOS user. You can learn more about ZIP and UNZIP at the Info-ZIP website, or use the -h ("help") option on the command line to print out a list of options.




1 Comment